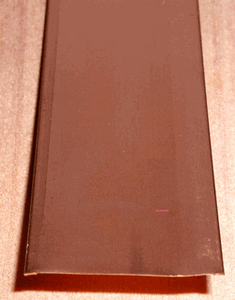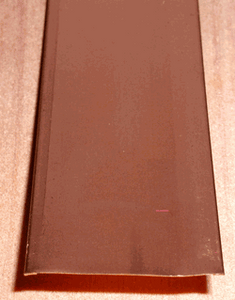
27B Spring Bronze & Lock Strip
When you are using spring bronze weatherstrip on a door, you cannot weatherstrip right next to the lock. These lock strips are used next to the lock. They are not usually used on the entire height of the door because of their greater resistance to compression, however this is a handy weatherstripping for small spaces.
Please see additional photos for typical installations.
Lock strips can be used in combination with either Pro Type or V-Shaped spring bronze weatherstrip. Normally, one wouldn't use both Pro Type and V-Shaped spring bronze weatherstrip on the same door. For purposes of illustration, some of our photos show both types.
The most common installation is Method 1. Install the lock strip before you install your other weatherstrip. In this method, the lock strip is cut to the same height as the strikeplate. Drill 2 or more holes 1/16" diameter into the back of the lock strip to allow nailing the lock strip into the door jamb. Make the holes sufficiently far from the right angle bend in the lock strip to allow the nail heads to lay flat. It is good practice to gently mold with your fingers the lock strip to ensure that the back has a good 90 degree angle. Hold the lock strip in place with a stick or blunt tool to ensure it is tight against the door stop and jamb while nailing. Use a nail set to carefully set the nails. After installing the lock strip, install your spring bronze weatherstrip as close as possible to the lock strip.
Sometimes it works better to install the lock strip the other way. (Method 2) Once again, you want to install the lock strip before the other weatherstrip. Determine if the door will close easily when the lock strip is in place. In general, you want the lock strip to compress a maximum of 1/8" when the door is closed. If the door will not close easily, for method 2 you will have to create a mortise in the door stop to accept the lock strip. (See photos.) Cut the lock strip about an inch longer than the strikeplate. When nailing use a putty knife or blunt object to hold the lock strip tight against the door stop and door jamb. Use a nail set to set the nails. After the lock strip is installed, install your Pro Type or V-Shaped weatherstrip. With Method 2, you can overlap the weatherstrip and lock strip. (See photos.)
We recommend a Spring Tools Nail Set.
Measures 3/8" on each leg.
Price breaks are available starting at quantities of 2, 4, 8, 10, 16, and 50.
- Shipping:
- Typically ships within 24 hours.
Reviews
-
27B Spring Bronze & Lock Strip
The product is very well made and seems like it will be quite durable.
-
Spring bronze lock strip
Perfect seal/refurbish for 95 year old doors.
-
Bronze door strips
Just what we needed to weather strip our 95 year old doors.
-
Excellent
Excellent
-
Excellent
Quality product and very good Customer Service. I'll buy this item again.
-
Excellent
Very courteous, very efficient, very helpful, very responsive.
-
Excellent
Kilian Hardware has great quality products at reasonable prices, and good customer service. I did have one question I submitted along with my most recent order that was not responded to, but they have otherwise always been prompt.
-
Excellent
Usually find what I need for my 86 year old Tudor revival home at Kilians. They are a great resource.
-
Good
Good product, shipped promptly and was packaged well. The cost of shipping was significant compared to the cost of the product. Their web site needs some work to provide better navigation to allow ease of finding a product and a better description of some products. Overall, this review was nit picking. I look forward to doing more business with Kilian Hardware but only for unique items that can't be found elsewhere due to shipping costs.


