Tape balances offer a streamlined solution for supporting double hung windows, eliminating the need for traditional pulley and weight systems. This design allows for closer window installations, as there are no bulky counterbalance pockets required between windows. Additionally, tape balances can be retrofitted into older sashes without the need to repair broken pulley and weight systems. Another advantage is that modern double glazed sash replacements are heavier and can easily be counterbalanced with higher capacity tape balances.
Types of Tape Balances
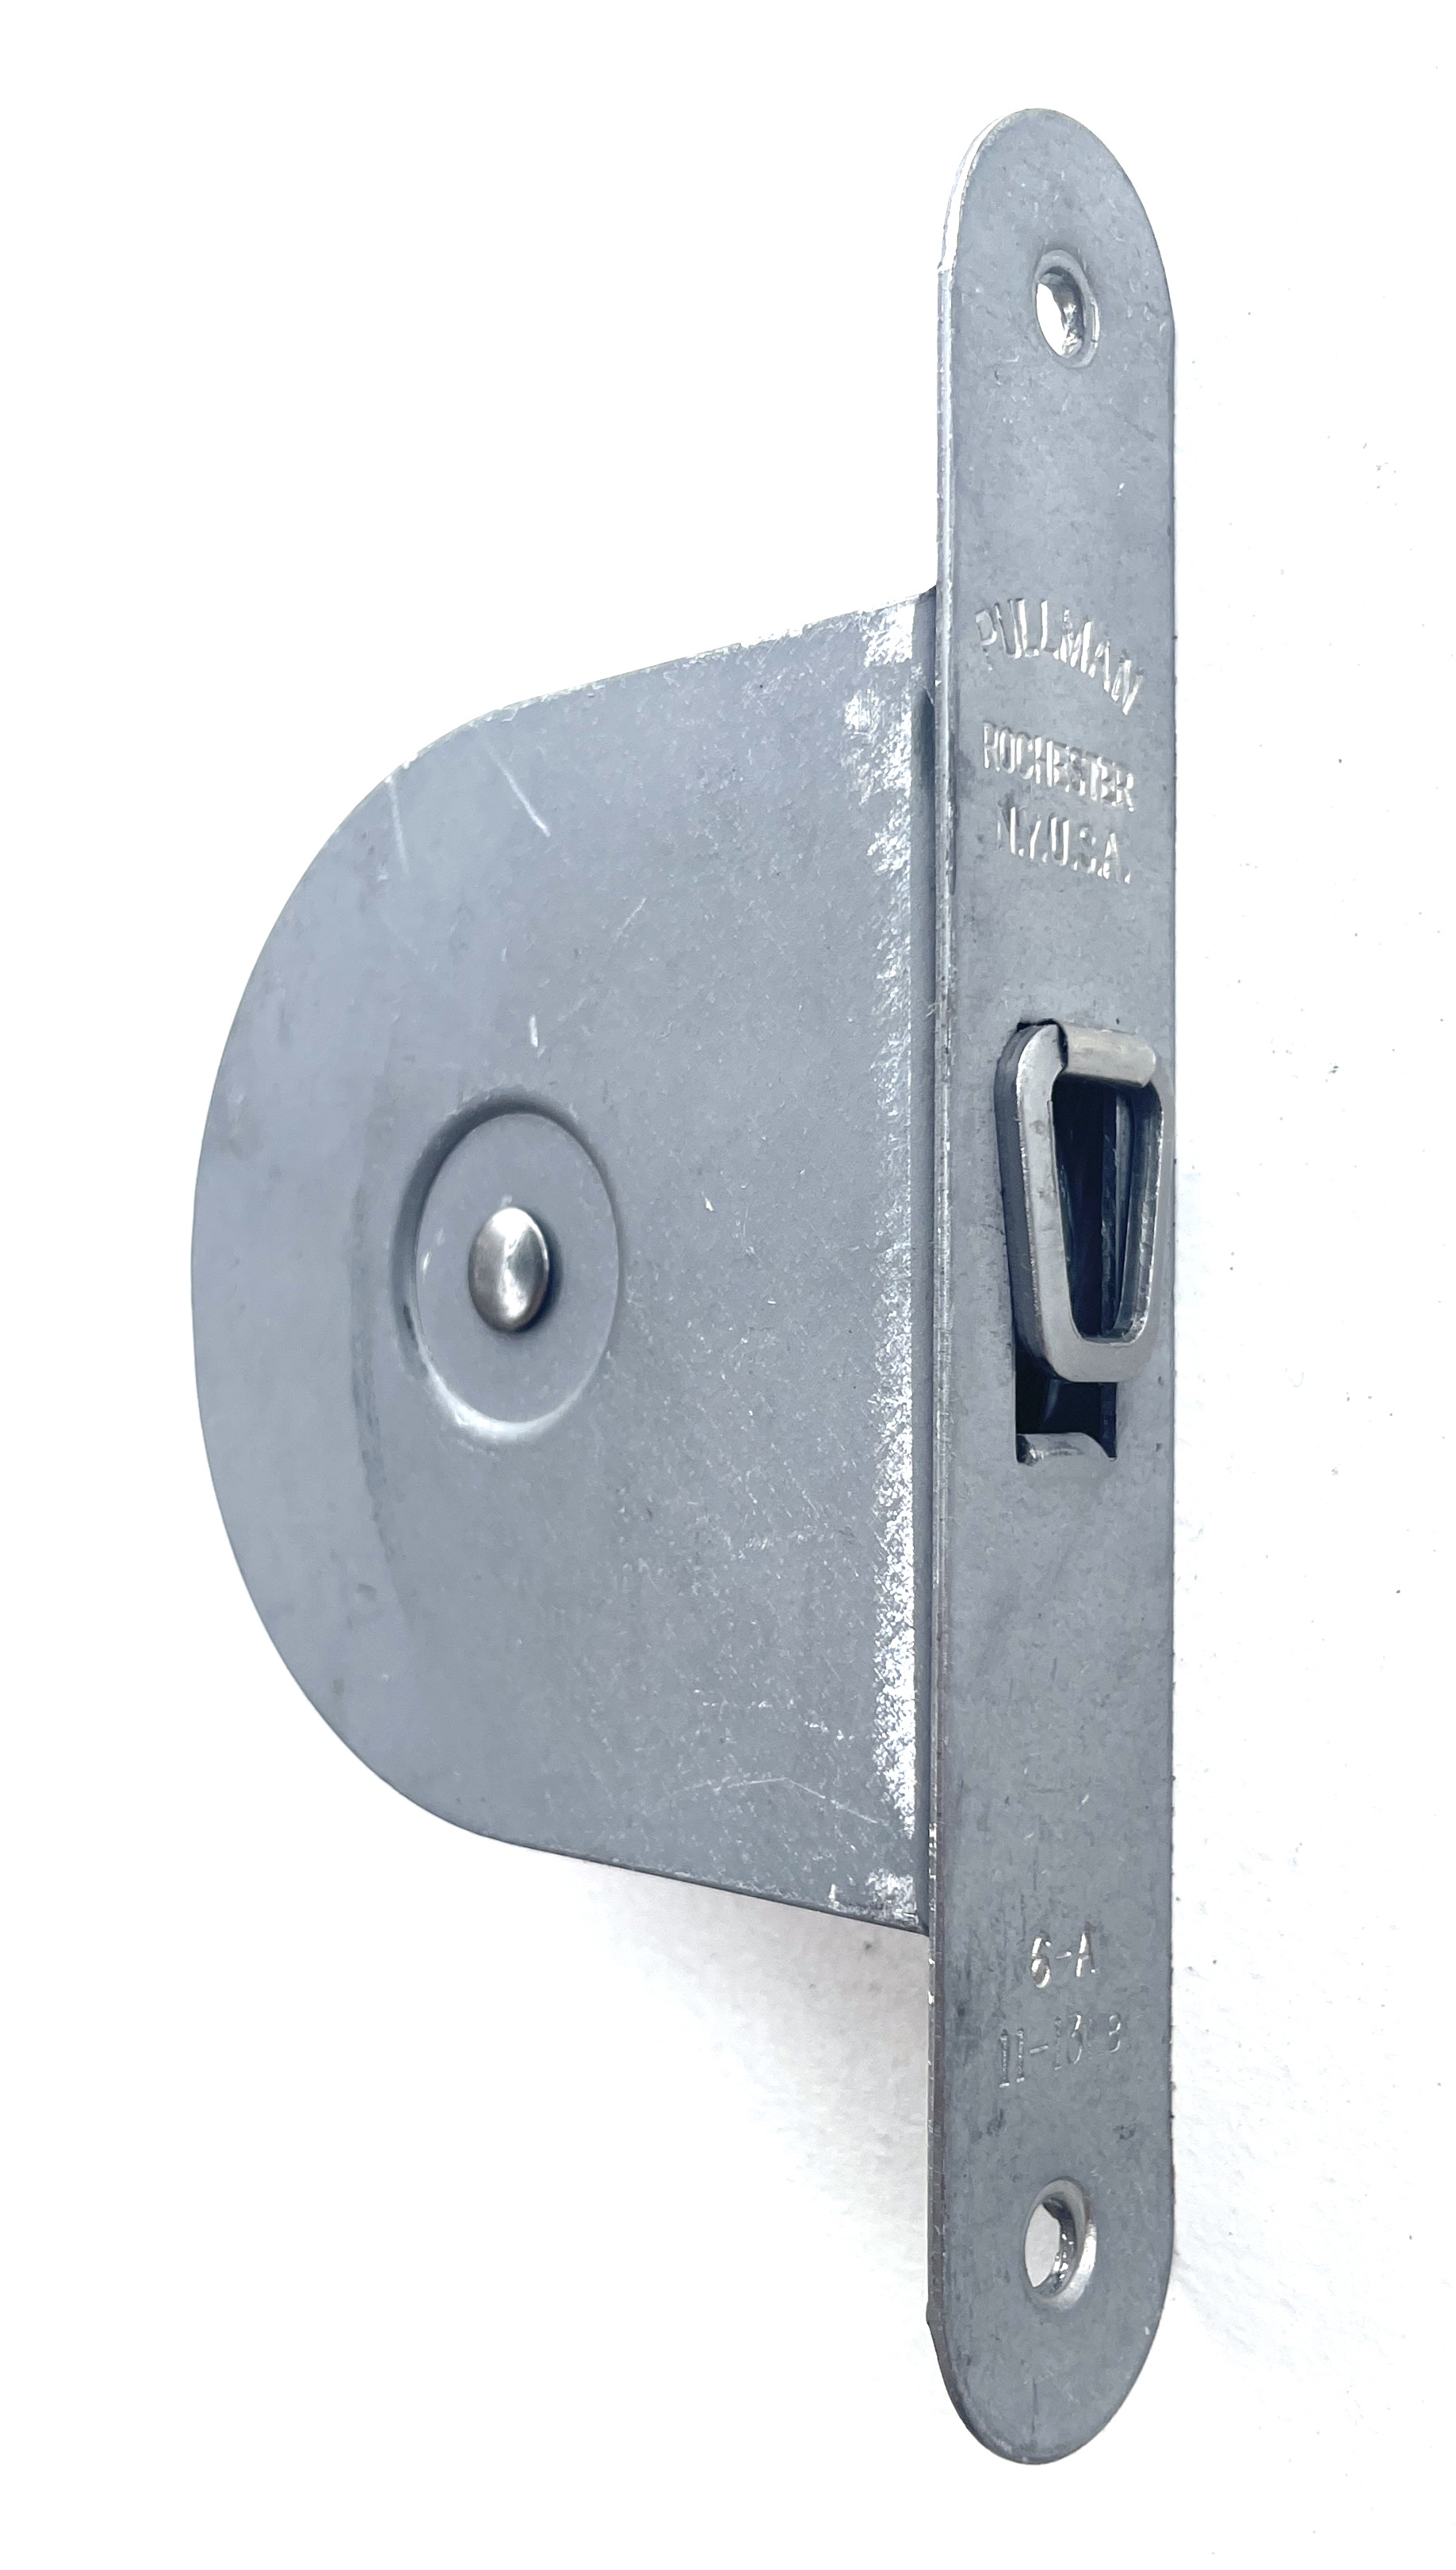
We offer both side mounted and overhead mounted tape balances. Side mounted tape balances are installed flush in the window jambs near the top and can easily replace old sash pulleys in retrofits. Overhead mounted tape balances are installed flush in the head of the window, with the faceplate in the upper corner of the window frame. Which type of balance you should use depends on your specific application. Side mounted tape balances are ideal when retrofitting an old pulley system, provide a more traditional look in older and historic homes, and require space on the sides of the window. Overhead mounted tape balances are useful when there is limited space in the jambs and offer a more hidden mechanism for a clean look. Side mounted tape balances are more commonly used.
 |
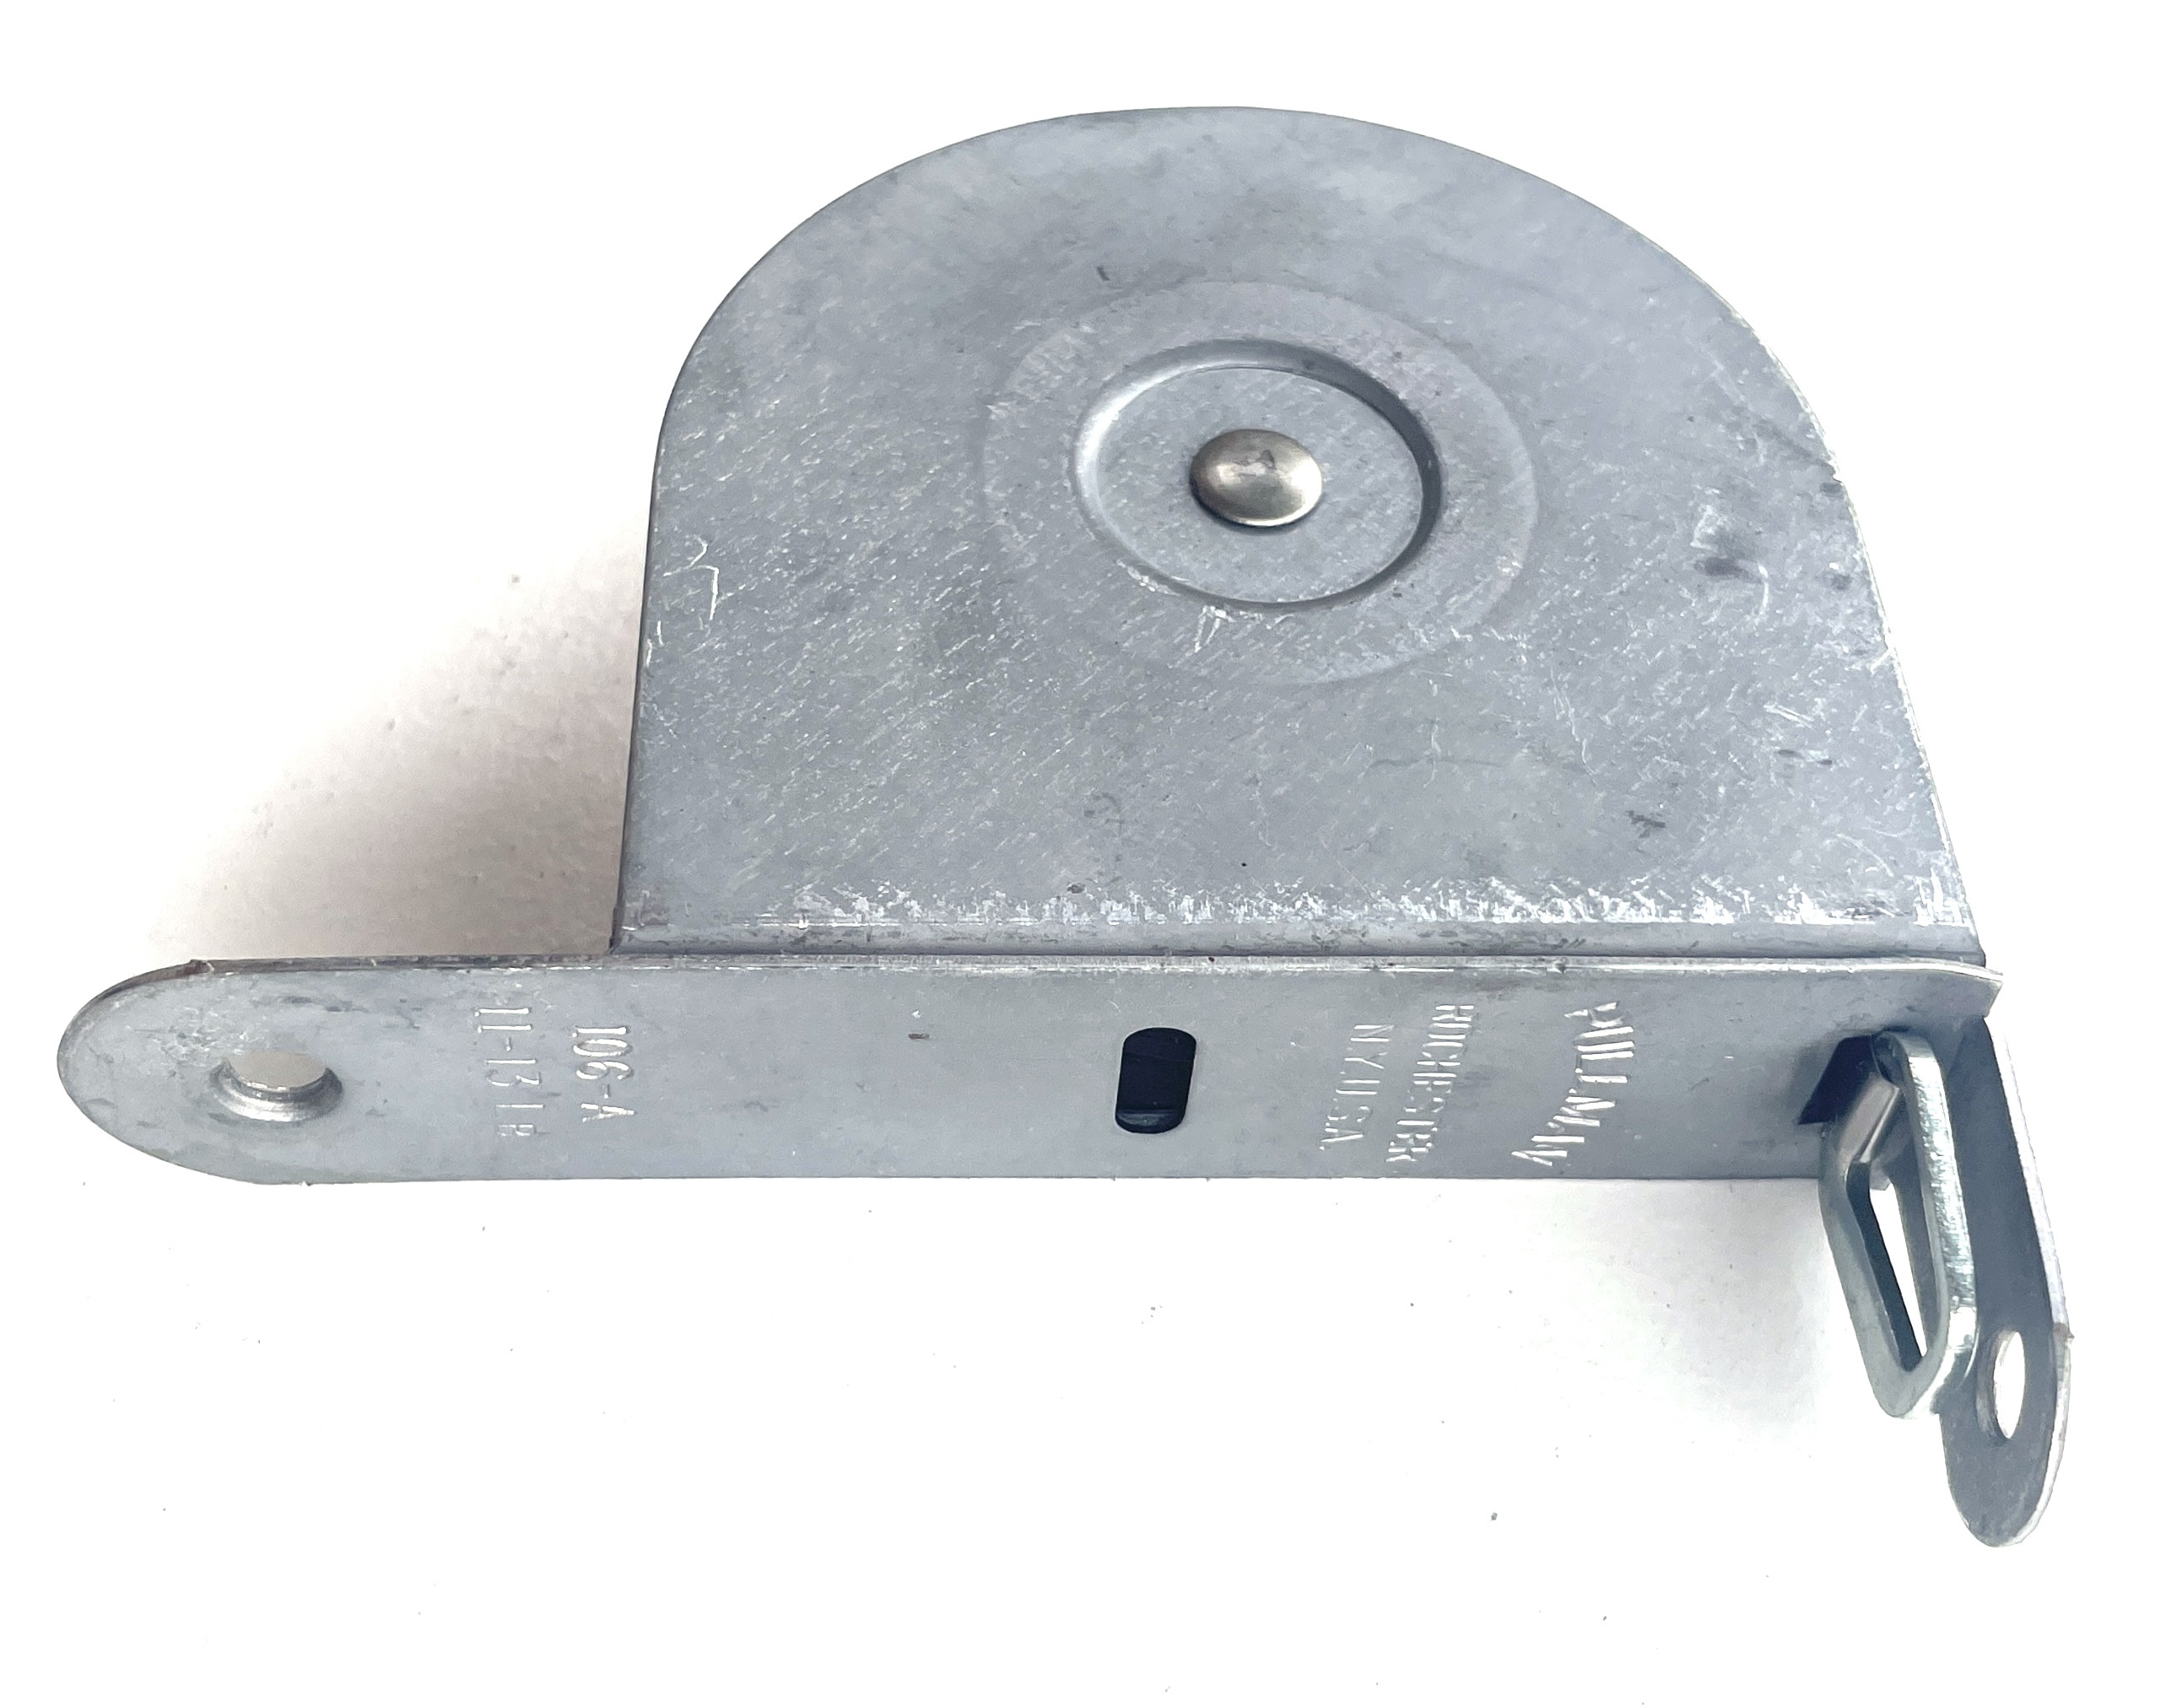 |
| Side Mounted Tape Balance | Overhead Mounted Tape Balance |
Choosing The Appropriate Size Tape Balance
Selecting the correct size tape balance is important because the balance must be properly tuned to hold your window in place when it is raised or lowered. To determine what size tape balance you need, you must first weigh your sash. To do this, take your sash out of the window, stand on a scale without the sash, and stand on a scale while holding the scale. Subtract the latter value from the former to determine the weight of your sash. Then, you may use the following chart to determine which size tape balance you need.
| Weight of Sash (Pounds) | Side Mounted: Compact | Side Mounted: Standard | Side Mounted: High Capacity | Overhead: Compact | Overhead: Standard |
| 5 to 7 | F-3 | A-3 | F-103 | ||
| 7 to 9 | F-4 | A-4 | F-104 | ||
| 9 to 11 | F-5 | A-5 | F-105 | ||
| 11 to 13 | F-6 | A-6 | F-106 | A-106 | |
| 13 to 15 | A-7 | A-107 | |||
| 15 to 17 | A-8 | A-108 | |||
| 17 to 19 | A-9 | A-109 | |||
| 19 to 21 | A-10 | A-110 | |||
| 21 to 23 | A-11 | ||||
| 23 to 25 | A-12 | ||||
| 25 to 27 | A-13 | ||||
| 27 to 29 | A-14 | ||||
| 30 to 32 | L-12 | ||||
| 33 to 35 | L-13 | ||||
| 36 to 38 | L-14 |
If your sash weight corresponds to a category with multiple options of balance, then you have a choice. The compact tape balances have a smaller overall size than the standard tape balances. The side or overhead mounting options may be preferred for different window setups. If your sash is heavier than 38 pounds, we can provide special high capacity balances for your window. Please call 215-247-0945 to order in this case. If your sash weight is exactly between two categories, we suggest sizing up.
Tape Balance Dimensions
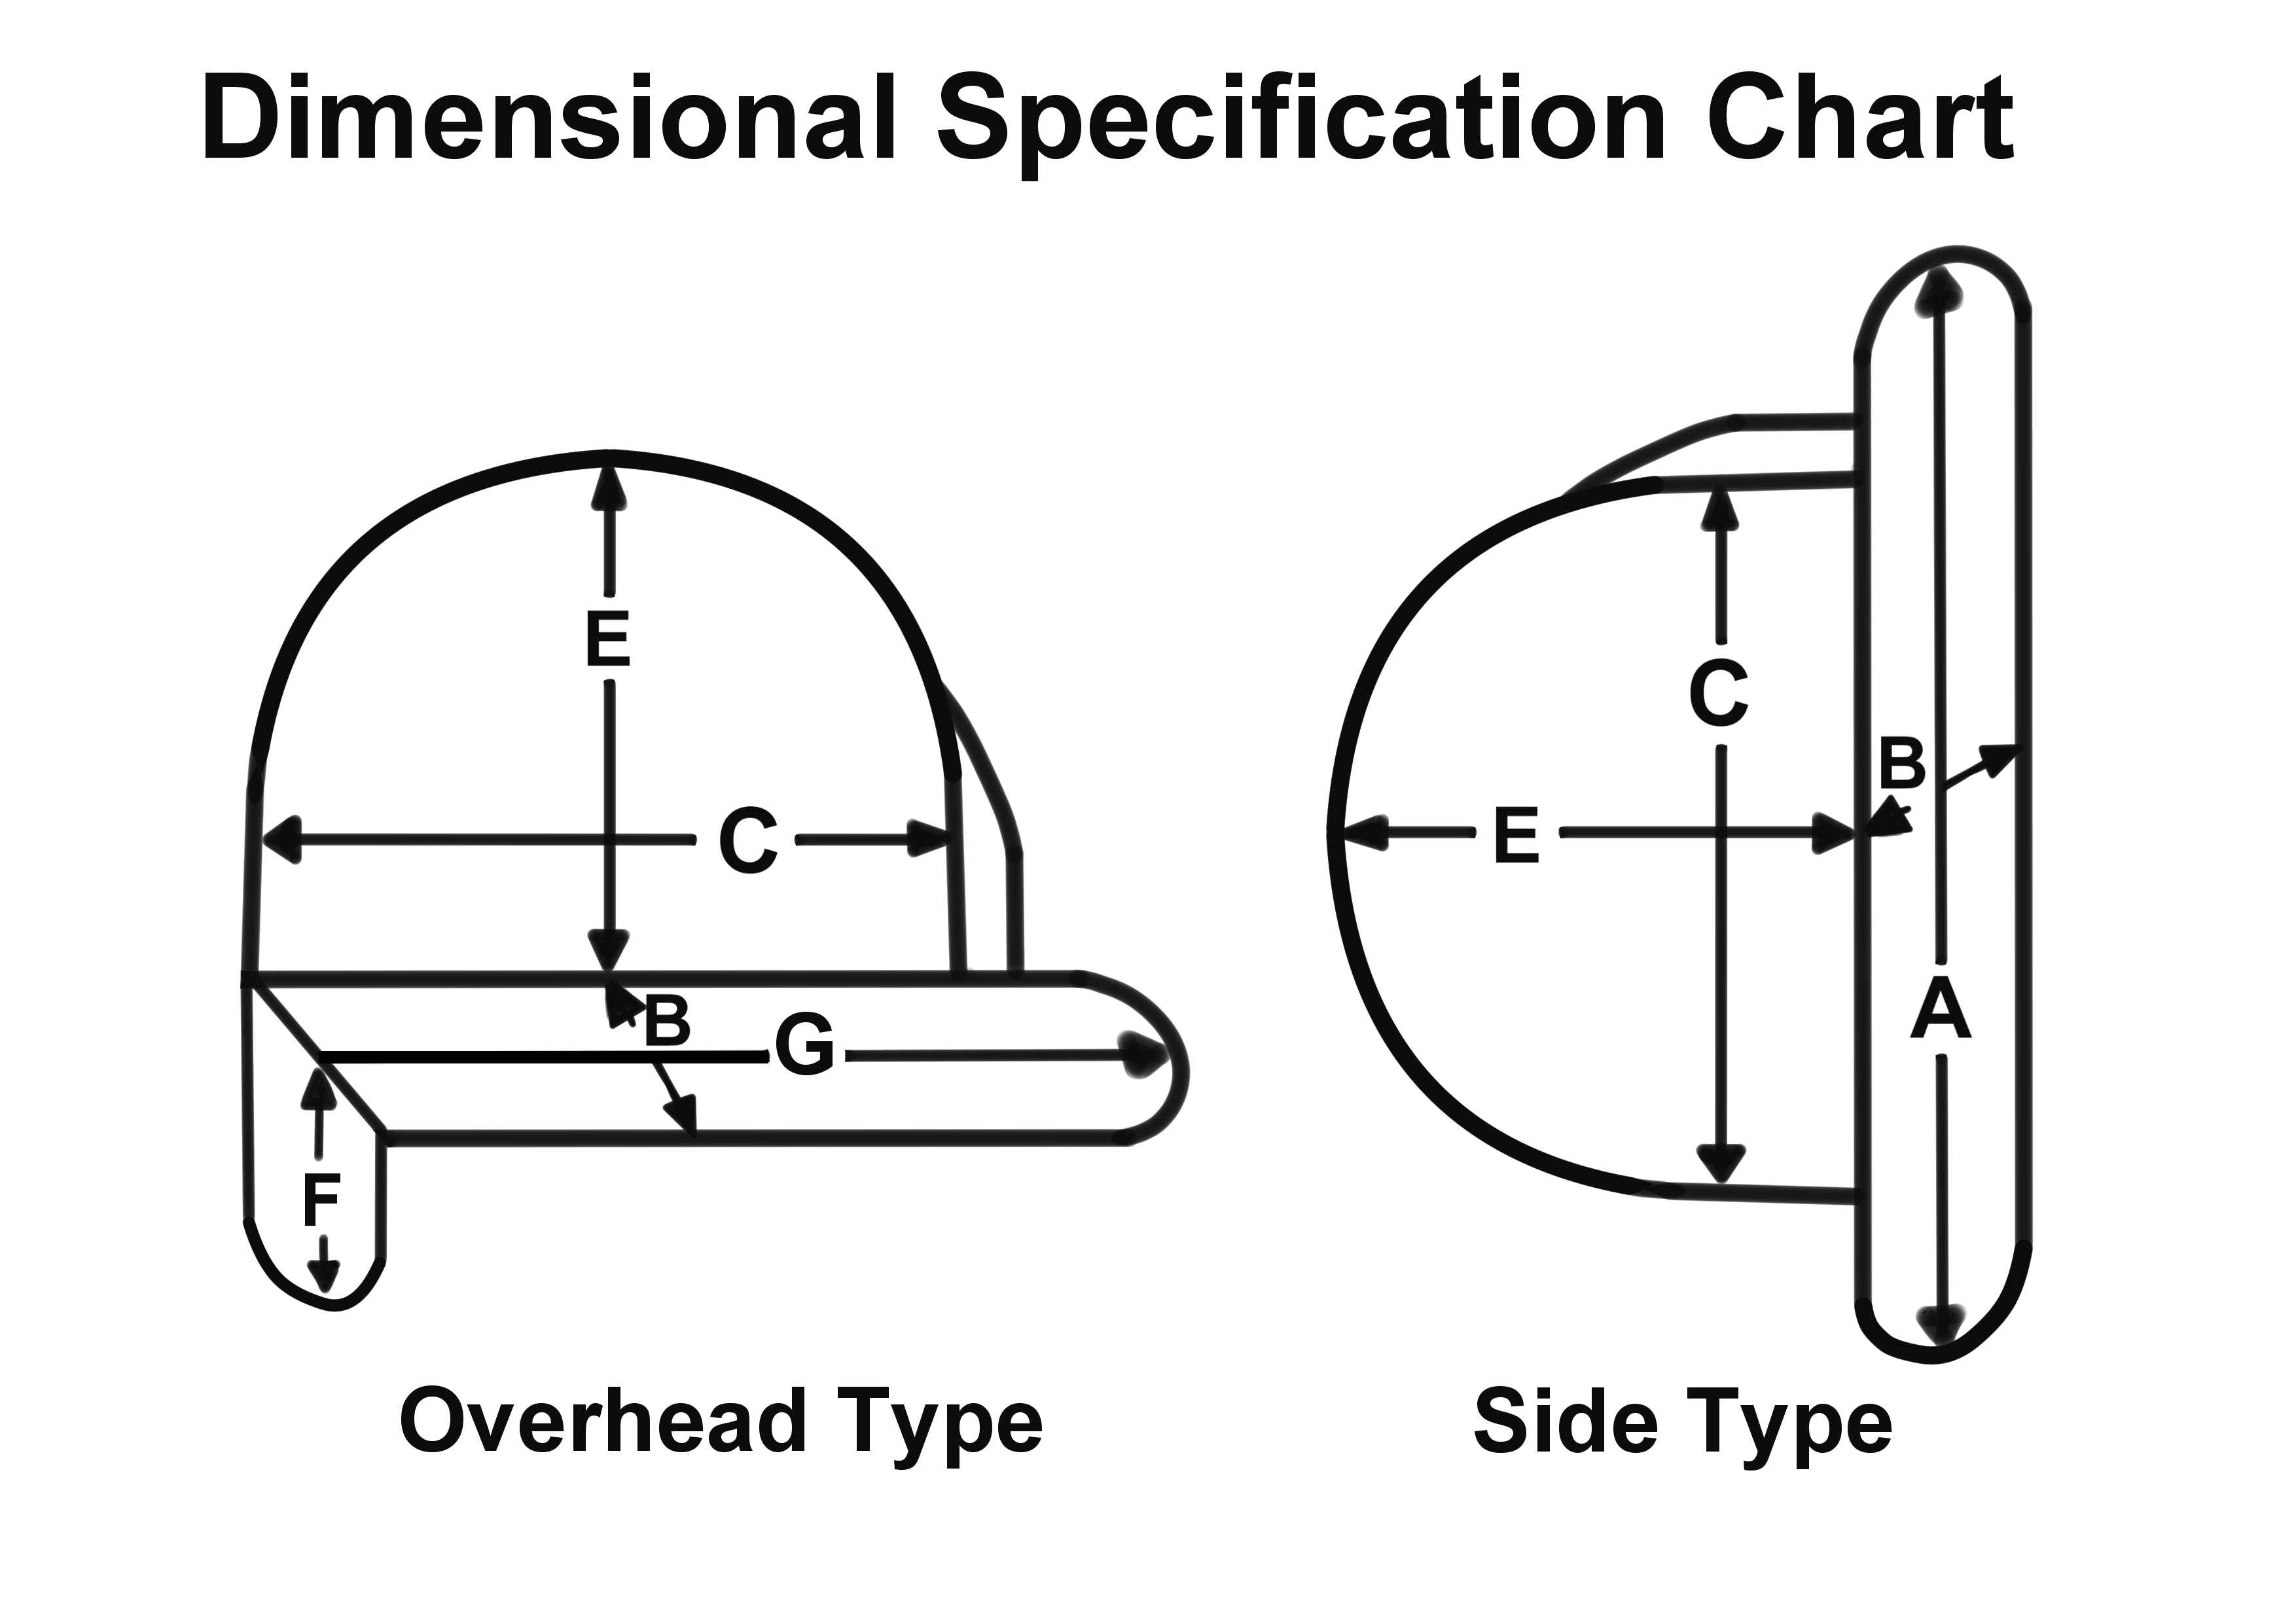
Compact, standard, and high capacity tape balances have different physical sizes from each other. See the chart below for the dimensions.
| Dimension | Compact | Standard | High Capacity |
| A | 4-1/2" | 6" | 7-7/16" |
| B | 1" | 1" | 1-3/8" |
| C | 2-1/2" | 3-7/16" | 4-7/16" |
| E | 2-5/8" | 3-7/16" | 4-3/8" |
| F | 1" | 1-5/16" | |
| G | 3-3/8" | 4-11/16" | |
| Tape Length | 40" | 46" | 54" |
Tape Balance Installation
When fitting the tape balances, avoid bending or kinking the tape, and don't let it slip from your fingers. If it flies back into the balance, it may damage the loop at the end. Also, always pull the tape straight downward - never outward or upward - to prevent damage. Keep the tape completely free from paint.
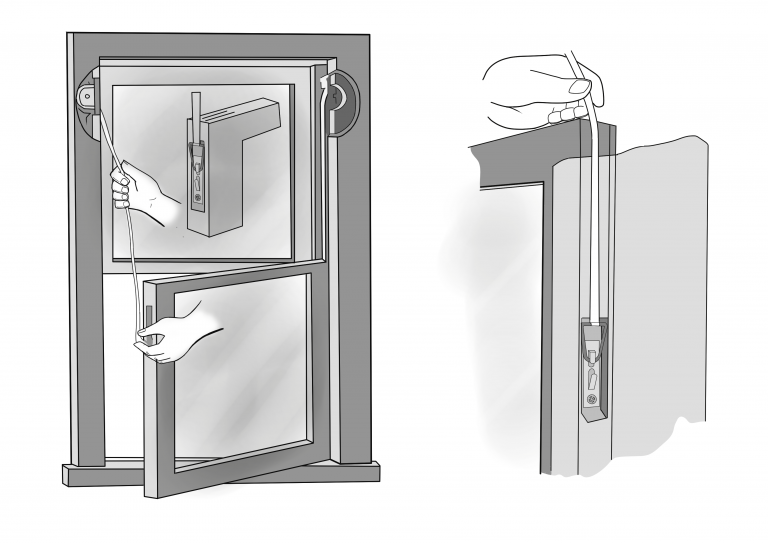
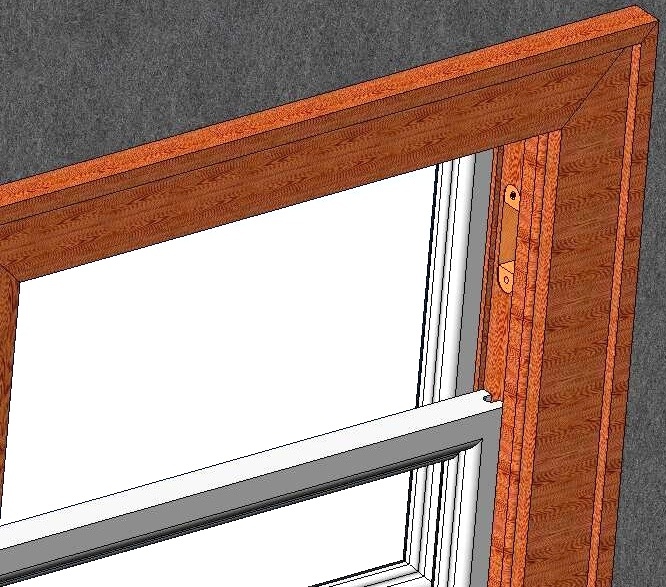
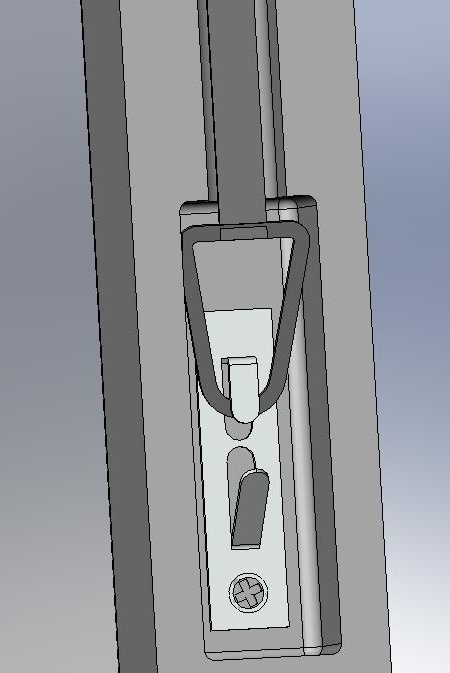
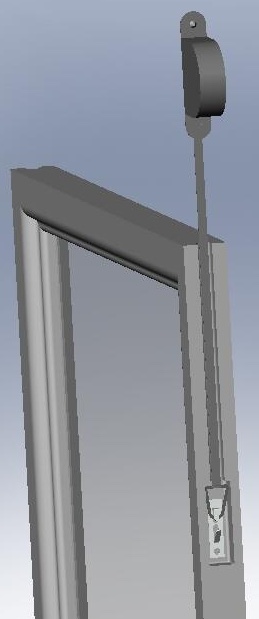
1) Position the balances and create pockets for them in the window frame
- For side mounted balances, place them about 3-1/2" below the top of the window.
- For overhead mounted balances, install similarly but mortise the top rail near the corners of the frame instead of the sides. If necessary, adjust the pocket so the faceplate sits flush with the frame.
2) Attach the tape hooks to the sash
- If no grooves exists on the sides of the sash, notch openings in the sash approximately 10 inches down for side mounted balances or 3 inches down for overhead mounted balances.
- Attach the tape hook with the screw hole at the bottom in the groove, ensuring the bottom angle piece aligns flush with the sash edge.
3) Finish installation
- Secure the balances in place with the included screws.
- Attach the loop on the retractable tape to the hooks on the sash.
- Check that the sash slides smoothly before reinstalling the stop bead. If necessary, lubricating paste wax may be applied to the edges of the sash.
